Step by Step Concept Art - Digital Painting Tutorial

If you're ready, let's start !
Step 1

a farthest Background, A middle Ground, and the foreground.
Each ground should have a little something of interest, even if it is just plantlife.
Step 2

top to get an idea of what you want.
Each "ground" can be a different shade of grey. Making them lighter or darker can drastically alter
a picture, deciding which ground you want darkest and lightest. In this example, i decided the farthers Background looked best as the darkest layer. and the focus lightest.
Step 3

i chose green colors as my base, and as you see the image progress, you will se the final product has an overall tinge of green.
Step 4

for this one i start off with patchy splotches of different greens and basic leaf shapes to block in the plant life, as well as a few stone works for interest.
Step 5

Starting on the middle ground with rough colors and some messy shadding.
Step 6

Step 7

Adding in some basic shading and just blocking it all in.
(note the overlay lighting layer is once again hidden.)
Step 8


Step 11

Here i have fleshed out the scenery benieth the waters surface, including a few fish and lighting.
On a multiply layer i create a darker piece overtop of the water, this will act as my waters "surface"
-i like to give this multiply layer a greenish or bluish tinge depending on scene.
i add a basic rough idea for the reflection on top.
Step 9

- Here i am going back into the backgrund layers and adding reflective lighting. Water reflects lighting in a wave like pattern, that is usually brighter closer to teh waters surface, as seen on the farthest back pillar, as well as on the stones in the front pillar. - Surrounding reflective lighting is also added all the way up to the top of the pillers. I continued to use a green tone for the lighting as it is in the surroundings. - I also blocked in some of the plantlife/lillies up front to give the waters surface some more interest.
Step 10

- Here i have went back into the background and refine the details. at this point i use a painting "brush" on 100% blending mode to smooth out edges and enrich colors. (Please note i do not use any custom brushes at all! so you do not need to buy or download any brushes for this. Photo Shop comes with all of the brushes i use) - You can also see more of the underwater lighting without the subjects reflections in the way. - also note that the top overlay layer for lighting is now turned off for good.

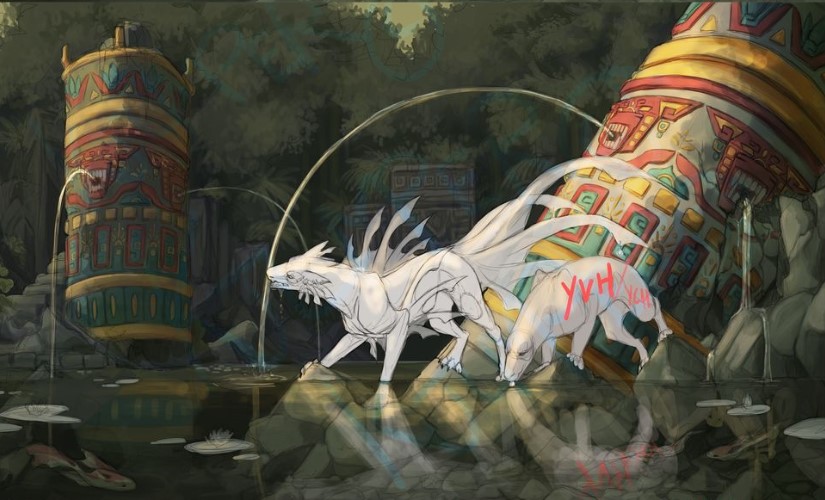
lastly is to finish up the subjects of the image, as well as any final details within the background and the reflections. - Remember to add reflective lighting from the water below, as well as your main lighting. - add in water ripples using the painting brush again to drag and blend in "rings" and waves. Smudge the reflections, and add in the final highlights
GOODBYEEEEE <3
Step by Step Concept Art - Digital Painting Tutorial
 Reviewed by painting
on
November 04, 2019
Rating:
Reviewed by painting
on
November 04, 2019
Rating:
Reviewed by painting
on
November 04, 2019
Rating:


No comments: